

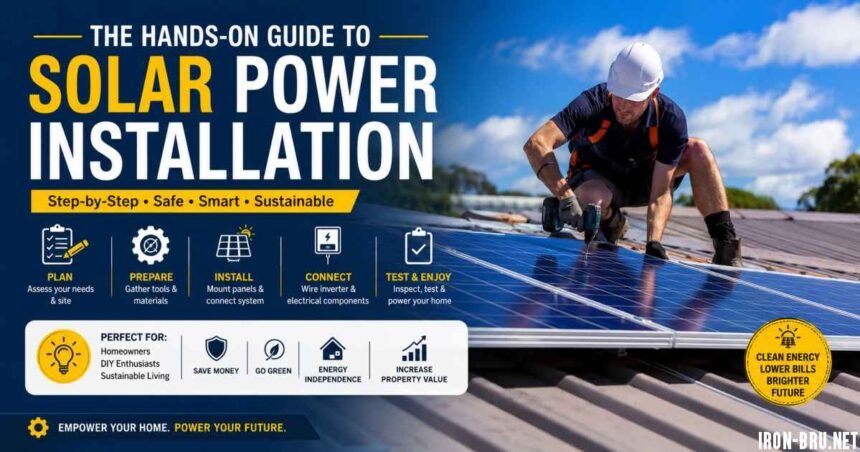


Are you ready to reduce your electricity bills by up to 90%, increase your home’s value, and gain greater energy independence? In 2026, solar energy is more efficient, affordable, and accessible than ever before. Thanks to advancements in high-efficiency solar panels, LiFePO4 lithium battery storage, smart inverters, and attractive government incentives in many countries, homeowners are switching to solar power at record rates.
Whether you’re planning a DIY solar installation or hiring a professional installer, understanding how a solar system works and how it’s installed helps you make smarter decisions, avoid costly mistakes, and maximize your return on investment. This hands-on guide to solar power installation covers everything from planning and equipment selection to wiring, activation, maintenance, and common installation errors.
How a Solar Power System Works: Understanding the Basics
Before installing solar panels, it’s essential to understand how a modern solar power system converts sunlight into usable electricity. Every component plays an important role in producing reliable, clean energy.
The process begins with solar panels, which capture sunlight and generate DC (Direct Current) electricity. That electricity flows to a solar charge controller, which regulates voltage and protects batteries from overcharging in systems that include storage. The power is then sent to a solar inverter, which converts DC electricity into AC (Alternating Current)—the type of electricity used by household appliances.
If your system includes battery storage, excess daytime energy is stored in LiFePO4 lithium batteries for use at night or during power outages. Any additional electricity can be exported back to the utility grid through net metering, allowing you to earn credits that reduce future electricity bills.
In 2026, the most popular options are grid-tied systems with battery backup and hybrid solar systems, offering the perfect balance between lower utility costs and reliable backup power during outages.
Step 1: Site Assessment and Energy Audit
Every successful solar installation begins with careful planning. Skipping this stage can result in an undersized or inefficient system.
Start by reviewing your last 12 months of electricity bills to determine your average monthly energy consumption measured in kilowatt-hours (kWh). A typical U.S. household consumes around 800–1,000 kWh per month, while many homes in countries such as India and Pakistan average 300–600 kWh monthly.
For example:
- 900 kWh ÷ 30 days = 30 kWh per day
- A home consuming approximately 30 kWh daily generally requires a 6kW–7kW solar system, assuming 4.5–5.5 peak sunlight hours each day.
Next, inspect your roof carefully. In the Northern Hemisphere, a south-facing roof typically delivers the highest solar production. The ideal panel tilt angle is close to your geographic latitude. Ensure your roof has approximately 250–400 square feet of unobstructed space for a typical 6kW installation, and use a solar shading app or Solar Pathfinder to identify trees, chimneys, or nearby buildings that may reduce panel performance.
Finally, verify all local building permits, utility interconnection requirements, and net metering regulations before purchasing equipment. Meeting these requirements helps avoid delays and allows you to qualify for available solar incentives, rebates, and tax credits where applicable.
Step 2: Choosing the Right Solar Equipment
The quality of your components determines how efficiently your system performs over the next 25–30 years, making equipment selection one of the most important decisions.
For solar panels, monocrystalline PERC and TOPCon technology dominate the market in 2026, offering efficiencies between 21% and 23.5%. Popular Tier-1 manufacturers include LONGi, Jinko Solar, Canadian Solar, and JA Solar. A standard 6kW system typically requires 10–12 panels rated around 550W each.
The solar inverter acts as the brain of your installation. String inverters remain a cost-effective option for roofs with minimal shading, while microinverters such as the Enphase IQ8+ maximize production on partially shaded roofs. In areas experiencing frequent power outages or load shedding, hybrid inverters from brands like Growatt, Solis, and Inverex provide excellent flexibility by combining solar generation with battery backup.
If backup power is important, invest in a 48V LiFePO4 lithium battery ranging from 5kWh to 10kWh, capable of powering essential household circuits overnight. Compared to traditional lead-acid batteries, lithium batteries offer significantly longer lifespans, faster charging, higher efficiency, and lower maintenance.
You’ll also need quality mounting rails, MC4 connectors, 6mm² UV-resistant PV cable, DC breakers, AC breakers, surge protection devices (SPD), and a proper grounding system. Choosing certified Tier-1 components backed by 25-year warranties ensures excellent long-term performance and peace of mind.
Step 3: Hands-On Solar Panel Installation Process
Once planning and equipment selection are complete, it’s time for the physical installation. Safety should always come first. Wear fall protection, insulated gloves, non-slip footwear, and never work alone when installing panels on a roof.
Begin by locating roof rafters and installing roof anchors or L-brackets using waterproof flashing to prevent future leaks. Secure the aluminum mounting rails, ensuring they are perfectly level and tightened according to manufacturer torque specifications. Proper mounting allows the system to withstand winds of up to 140 mph in many certified installations.
Next, carefully position the solar panels on the rails using mid-clamps and end-clamps. Maintain a 3–6 inch ventilation gap beneath each panel to improve airflow and reduce operating temperatures, increasing overall efficiency. Wire panels together according to the inverter’s voltage requirements, typically in series to achieve the desired operating voltage.
Route PV cables neatly toward the inverter using weatherproof conduit where required. Install a DC disconnect switch, surge protection, and appropriately rated fuses before connecting the array. Every panel frame and mounting rail should be properly grounded and bonded to reduce the risk of electrical shock, lightning damage, and inverter failure.
Always inspect each MC4 connector carefully. Even one loose connection can cause arc faults, reduced energy production, or long-term reliability issues.
Step 4: Inverter, Battery Installation, Grid Connection & Commissioning
Installing the inverter and connecting the electrical system is the most technical stage of the project.
Mount the solar inverter in a shaded, cool, well-ventilated location such as a garage or utility room. Connect the incoming DC cables from the solar array while carefully observing correct polarity.
If you’re installing a hybrid solar system, connect the LiFePO4 battery bank using appropriately sized 25mm² battery cables. Configure battery settings within the inverter, including battery chemistry, charging voltage, discharge limits, and backup preferences.
Connect the inverter’s AC output to your home’s main distribution board (DB) using a dedicated AC breaker and changeover switch. For grid-tied systems, this connection allows net metering so excess electricity can be exported to the utility grid. Many jurisdictions also require anti-islanding protection, ensuring the inverter automatically disconnects during utility outages for safety.
Commission the system using the recommended startup sequence:
- Turn ON the DC breaker
- Power ON the battery (if installed)
- Switch ON the AC breaker
- Start the inverter
Modern inverters now include Wi-Fi monitoring, allowing homeowners to track real-time voltage, daily energy production, system efficiency, and power consumption through a mobile application from virtually anywhere.
If you’re unfamiliar with electrical codes, always hire a licensed electrician to complete the final grid connection safely and legally.
Common Mistakes to Avoid, Maintenance Tips & Final Verdict
Even experienced DIY installers can make mistakes that reduce efficiency or create safety hazards. One of the most common errors is undersizing electrical cables, which can cause overheating and energy loss. Ignoring roof shading may reduce annual production by up to 40%, while poor grounding remains one of the leading causes of inverter failure. Installing panels in the wrong orientation or using low-quality, uncertified breakers can also significantly impact long-term performance.
Fortunately, maintaining a modern solar power system is straightforward. Clean your solar panels every 2–3 months using water and a soft brush to remove dust, pollen, and debris. Monitor system performance weekly through the inverter app and investigate any unexpected drop in production. Trim nearby trees annually to prevent new shading, inspect electrical connections yearly, and keep inverter cooling vents or air filters clean for optimal operation.
A properly installed solar system typically operates for 25–30 years, with annual panel degradation averaging only 0.5%. Depending on electricity prices, incentives, and system size, many homeowners recover their investment within 2.5 to 4 years, after which the electricity produced is essentially free.
Final Verdict
Installing solar power in 2026 remains one of the smartest long-term investments for homeowners seeking lower electricity costs, greater energy security, and reduced environmental impact. Whether you choose a DIY installation or work with experienced professionals, understanding system design, selecting quality equipment, following proper installation procedures, and performing regular maintenance will ensure your solar system delivers reliable, efficient power for decades.
Start your solar journey today and transform your roof into a clean, renewable power station that saves money while powering your future.